11.05.2010

In Paris as in Brookline


As I ate the oysters with their strong taste of the sea and their faint metallic taste that the cold white wine washed away, leaving only the sea taste and the succulent texture, and as I drank their cold liquid from each shell and washed it down with the crisp taste of the wine, I lost the empty feeling and began to be happy and to make plans. (From A Moveable Feast, Hemingway's recollections of his years as a young man in Paris in the 1920's)

I traveled to the City of Light in August, ready to blog about everything I ate, but I didn't write a word (here is a link to an article I wish I'd written). In Paris, as in Brookline, I was just a mom trying to get through the day — the trip was essentially about parenting, but in better surroundings. I certainly had expected our journey to be food-driven: I downloaded A Moveable Feast onto my iPhone as soon as I booked my seats. I spent hours, days, weeks, researching restaurants. I yellow-highlighted foodie destinations in Zagats and Alexander Lobrano's Hungry for Paris. I ripped pages from the travel section of the NYTimes and the market edition of Saveur. I bookmarked a half dozen Paris food blogs on my laptop. I went into a full-blown panic when I realized that some, possibly many, restaurants would be closed in August and started a flurry of international calls and online reservations. I told my daughter and our traveling companions that, for me, Paris was only about the food. Sure, they could shop and see some art and stuff, but I would spend the week consumed, as it were, with what we'd eat. And so I left for eight days, hungry and excited, ready to walk in the footsteps of Julia Child, Dorie Greenspan, and even David Sedaris. I left dreaming of Hemingway's wine and oysters.

Paris was Paris. It doesn't disappoint. But, I didn't even go to a single restaurant on my list — except for one, L'As du Falafel. And, while we were there, munching on the crispy chickpeas; cool tomato, cucumber, and cabbage; creamy tahini and yogurt; and melt-in-your-mouth fried eggplant, my daughter had some sort of crazed teenage hormone fit. Between bites she regaled us (and most of the restaurant) with a list of the top 10 characteristics she hates about me. It's a testament to L'As du Falafal that the meal still rocked and we went back more than once. I soon realized that just because I was in Paris, it didn't mean I was in heaven or immune to all of the forces that, for better or for worse, run my life back at home.

Other moments of horror: long interludes at Adidas and Sephora on the Champs de Elysées when I kept having to run outside to remember I wasn't in Copley Square, and umpteen stops at souvenir shops to look at yet another metal pink Eiffel Tower and I Heart Paris underpants. As well as various interludes of arguments between the kids or the tensions of being in a foreign city. ("Mom, do we have to have French food again tonight?" Or, "Do you think we could find Grey's Anatomy on this TV?")

But, there were many more moments of joy than agony: coming face-to-face with gargoyles and rooftops at the top of Notre Dame; lounging topless, engulfed in steam and tiles, deep in the heart of a left bank Turkish bath; and overcoming my terror of heights to ride to the very top of the Eiffel Tower (touristy, I know). I was so impressed with myself that once I recovered from the elevator ride I bought a 10 euro glass of champagne selected by Alain Ducasse — the closest I would get to him or any of his restaurants. We had picnics by the Seine, once even with paella we came across at a market on our way to the river.


We were so busy during the day — soaking up the energy of the streets and stones and bridges and paintings — that by the time we were ready for dinner it was 9 or 10 p.m. and I couldn't ask two 14-year-old girls to hop back on the tro to go to L'Atelier de Jöel Rubicon or Cafe Burq. They didn't care that every other post in Paris By Mouth was about the opening of Daniel Rose's Spring. Spring was in the 1st arrondissement and we were in the 4th, and they just wanted to eat, which was unexpectedly fine with me. The only meals the girls really cherished, with the exception of an occasional cheese plate, were a daily Nutella crêpe in the afternoon and gelato just before midnight, when our local gelateria closed.

In the end our greatest joy was our neighborhood. It trumped every second of my wasted restaurant research.


Once we settled into our apartment in the Marais, it was clear that it really wasn't necessary to go anywhere else. So, essentially every day for eight days — with the exception of a dinner party with a friend and one trip to the left bank for fondue — I sat down at one of the many bistros within spitting distance of our apartment, flirted with an endless stream of cute waiters, and ordered steak frites and a bottle of bordeaux. Pretty much without fail.

Okay, once I had moule frites. but that was it.


And I didn't have a single oyster. Or even a glass of white wine. Which, clearly, just means that I have to go back.

Yummy Falafal (even on a bad day)
adapted from The Flexitarian Table by Peter Berley

1/2 c chopped cilantro (or parsley if you're one of those annoying people who insists that cilantro tastes like soap, even though it's really parsley that tastes like soap. You know who you are.)
3/4 c dried chickpeas soaked and drained
1 1/2 t lemon juice
3 T chopped red onion
1 garlic clove chopped
1 t cumin
3/4 t salt
1/2 t ground coriander
1/2 t baking soda
1/8 t cayenne pepper
4 grinds black pepper
4 - 6 c canola oil for frying

In a food processor pulse the cilantro/parsley until finely chopped. Add chickpeas until finely ground (cracker crumb consistency). Add the lemon juice, onion, garlic, cumin, salt, coriander, baking soda, cayenne, and black pepper and pulse to combine. The mixture should hold its shape when squeezed. If it doesn't, process for a few seconds more. Transfer to a large bowl and toss well.

Fill a medium heavy sauce pan or Dutch oven with at least 3 inches of oil, attach a deep-frying thermometer to the side of the pot, and heat the oil to 360 degrees (don't let it drop below 350 after the falafal is added). Line a platter w paper towels.

Moisten your hands and divide the falafel mixture into 12 equal portions (about 2 scant T each). Form each into an oval about 2 inches long and 1/2 and inch thick, moistening your hands as needed while you work.

Fry the falafal a few at a time, turning halfway through until well-browned, about 4 minutes per batch. Transfer to the paper-towel-lined platter to drain. Return the oil to 360 degrees between each batch. Serve warm on pita bread with: tomato, cucumber, yogurt, tahini, red onion, pickles, etc....

8.29.2010

Blue Skies, Green Sauce


Well, dear readers, while Janetta stalwartly kept you entertained this summer, plying you with recipes for delectable food and thoughts about life, I found myself struggling mightily to wrestle the school year to the ground. It. Would. Not. Die.

Not that I don't love my job; I do. But the moment of feeling free and clear, ready to recharge, just took longer to arrive than I would have liked. But arrive it did: I can now report, most happily, that—just as I am readying myself for the upcoming school year—I am grabbing some moments to revel in these last, beautiful days of summer. I am done with exams, grading, meetings, reports, and much of the other business involved in finishing up yet another school year, and poised to start all over again. But for a few days now—at long last—I feel free to turn my thoughts from blue books to blue skies.

I look forward to sharing what I cooked and ate and thought about this summer. I have a backlog of recipes and food-related thoughts and adventures to write about—among them, a recent spate of meals chez moi consisting of various mezze perfect for warm summer and early autumn days. But for now I will (finally!) deliver the recipe for the enchiladas mentioned by Janetta a few posts ago. I made them for our school’s Diversity Potluck last spring, and, dare I say, they came out pretty tasty—in the words of my Nana, muy sabrosas.

A note about the recipes I am giving you…. My mother is Mexican, and she makes a mean enchilada. I could give you her recipe. But as I prepared to make my batch for the potluck lunch, I realized that her recipe is not written down, and I would have to calculate quantities for the recipe when I wrote it up… so for a baseline set of measurements I consulted my favorite Mexican cookbooks, a few each by Diana Kennedy and Rick Bayless. And then I trolled through a number of other, more general cookbooks. In the end, perhaps oddly, I decided to use the distinctly not-Mexican Mark Bittman’s recipes for both green sauce and enchiladas; his recipes are a bit more streamlined than the others, but much the same… and they yield a dish of authentic, well-rounded deliciousness.

Enchiladas verdes, green enchiladas, are the best kind of “peasant” food—simple ingredients that blend satisfyingly into a whole greater than its parts. I encourage you to seek out the best ingredients you can when you assemble these. You don’t need to make your own corn tortillas (I didn’t), but buy good ones that aren’t over-processed, but rather look golden and grainy. I actually like the ones you can buy at Trader Joe’s, and the organic ones at Whole Foods. And, if you are looking for one-stop shopping, Whole Foods will also yield up the other important bits: queso fresco and queso cotija, a salty artisanal Mexican cheese, as well as the requisite tomatillos, peppers, cilantro, and so on.


I love salsa verde. So much that is so, well, green goes into it. Just looking at the pile of ingredients makes me happy. And cooking with tomatillos (sometimes called tomates verdes, or green tomatoes) always proves interesting. Their papery hulls are fun to peel off (especially for the likes of Sam), the oddly sticky quality of their skin fascinates me, and they pack a nutritional wallop: low in calories, they contain a large amount of potassium and good bits of vitamin C, folic acid, and vitamin A. And their tangy, lemony flavor complements chiles (moderating their bite) and more. (Interestingly, they contain a substance much like pectin, which thickens sauces or salsas as they cool.)

Other things to do with tomatillos? You can add them raw to cold soups or stir-fry them in a little bit of oil or broth with some onions, garlic, salt, and pepper. And a simple yet delicious way to eat them is as part of a salsa crude, or raw salsa, to eat with chips or on the side of any number of meals: mix together chopped tomatillos, tomatoes, onions, jalapeños, and cilantro, then season to taste with lime juice and salt.

Bueno. Without further ado, the recipes. Buen provecho!

Salsa Verde
(Cooked Tomatillo Salsa)
Adapted from Mark Bittman’s How to Cook Everything Vegetarian

Bittman suggests that for milder sauce, you substitute poblanos for the hot chile. For “in-your-face heat,” leave the seeds in the jalapeños or add even more, to taste.
I heartily endorse Bittman’s suggestion to add salsa verde to scrambled eggs; very tasty.

20 to 24 tomatillos, husked and rinsed
6 T neutral oil, like grapeseed or corn
4 large onions, diced
10-14 cloves garlic, minced
4 medium poblano or other mild fresh green chiles, roasted and cleaned (See note below. And do know that even though the roasting and cleaning do add some time and labor, they are well worth it—you’ll relish the added layer of taste you get from the roasting.)
2 or 3 serrano or other hot fresh green chiles, roasted and cleaned if desired; otherwise, just chopped
2 t dried oregano, preferably Mexican
2 c vegetable stock or water
1-2 c chopped cilantro
½ c freshly squeezed lime juice
salt and pepper to taste

1. Preheat the oven to 400 degrees F. Put the tomatillos on a baking sheet and roast until the skins are lightly browned and blistered, about 20 min. Remove the tomatillos; when they’re cool enough to handle, chop them finely, along with the chiles, saving their juices.
2. While the tomatillos are roasting, put the olive oil in a large deep skillet over medium heat. When hot, add the onions and garlic and cook, stirring occasionally, until very soft and lightly browned, about 10 min. Add the tomatillos, chiles, oregano, stock, and a large pinch of salt and pepper; stir and bring to a low simmer. Cook, stirring occasionally, until the mixture is slightly thickened, 10 to 15 minutes.
3. Stir in the cilantro and lime juice and taste and adjust the seasoning. Purée salsa in the pan using an immersion blender, or cool and purée in a blender or food processor.

The quantities listed here constitute a double recipe of the salsa, yielding about 4 cups—plenty for the enchiladas, with a little left over for your scrambled eggs in the morning.


Enchiladas Verdes
(Cheese Enchiladas with Green Sauce)
Makes about 8 servings.

Neutral oil, such as grapeseed or corn, for frying
24 small corn tortillas, plus more if any break
5 c shredded Montery Jack or cotija cheese, or a combination
½ c crumbled queso fresco for garnish
½ c chopped red onion or scallion for garnish (I like to use both, just for the color of it)
½ c chopped fresh cilantro for garnish
Lime wedges for garnish

1. Preheat the oven to 350 degrees F. Spoon a thin layer of the salsa verde into the bottom of a 9- x 12-inch baking dish. Put about ½ inch of the oil in a large, deep skillet over medium-high heat. When hot but not smoking, cook the tortillas, one at a tine, until softened and pliable, about 10-15 seconds. Add more oil to the pan as needed. Drain on paper towels.
2. Sprinkle about 2 T of the Monterey Jack (or cotija) in the center of each tortilla, roll tightly, and put the enchiladas in the prepared dish, seam side down. The rolls should be packed in snugly against one another. Cover the top with some more salsa and bake for 25 minutes or until the enchiladas are warmed through and the cheese has melted. When the enchiladas come out of the oven, sprinkle them with the queso fresco, onion and/or scallions, and cilantro. Serve with lime wedges on the side and pass extra salsa on the side. For a fuller plate, you could serve the enchiladas with a side of black or pinto beans, and a small chopped salad of romaine lettuce, tomatoes, and radishes, with an olive oil/lime dressing.


Note on roasting peppers: Bittman describes two methods. I generally broil the peppers. But you can also skewer them on a long fork and roast them over a gas burner—very attentively, as they can easily burn.

To roast or broil: Preheat the oven to 450 degrees F or the broiler and put the rack about 4 inches from the heat source. Put the peppers in a foil-lined roasting pan. Roast or broil, turning the peppers as each side browns, until they have darkened and collapsed, 15 or 20 min in the broiler, up to an hour in the oven.
To grill: Heat a charcoal or gas grill until hot and put the rack about 4 in from the heat source. When the fire is hot, put the peppers directly over the heat. Grill, turning as each side blackens, until they collapse, about 15 min.

When the peppers are done, wrap them in foil (if you roasted them in the oven, you can use the same foil that lined the pan) and cool until you can handle them, then remove the skin, seeds, and stems—doing so is a little easier under running water. Don’t worry if the peppers fall apart.


I wish everyone a safe Labor Day weekend, and a lovely last taste of summer!


7.25.2010

Wallowing: Linguini with Clam Sauce and Chilis


When you break up with someone (or they break up with you), what do you do with the food? You know, the food that you loved to cook and eat together. The food that meant something — although in hindsight, you're not sure quite what. I guess if you hate that person, you just don't eat it anymore. It becomes repellent, like the time I got food poisoning after eating salmon and had to avoid it for several years. Or, even worse, when I was 17 and drank gin for the first time and threw up for 12 hours straight. That was in 1982 and I think it was just a year ago that gin revisited the bottom of my glass.

But, what if you don't want to avoid it? Because you still love the food. Because you still love the person. What if you didn't want to break up. They just chose someone else. So, you're not so much broken up as just broken. Do you give up the food then? It's not like it makes you sick like salmon or gin, but it doesn't make you feel particularly good either, and your friends have been telling you for years (yes, years) that you need to get over it already. You're supposed to heal. In order to heal, do you need to give up the food?

I have a friend who is currently married with two beautiful girls. But there was a time — before the married and way before the girls — that she wallowed for several years about someone else. At one point, just a couple of months before the wallowing came to a close, we made a fire in her parents backyard and burned all of the stuff that he had ever given her. Anything that meant something — shoes, photos, letters.... I'm not there yet. If I purged my house of this relationship, it would be empty. I'm already empty enough. But my fridge is still full.


Tonight I made linguine with clam sauce — one of the last things we ate together, when we knew that it was the end and every moment needed to count. I don't know what makes this recipe I found in the April Saveur so much better than every other linguine with clam sauce recipe I've ever made, but it is. Maybe it's the serrano chile, half of which you stir in with the pancetta and garlic; half of which you sprinkle raw on top. The chile makes it hot — ideal for extra exciting kissing, or for dulling the pain.

I didn't premeditate the meal. Or if I did, I told myself that I made it because S just left for two weeks of summer camp, and she refuses to eat clams. So, I ate them alone while watching Friday Night Lights. In episode one, the gorgeous star quarterback who's sure to take the team to the state championship is paralyzed after a tackle gone wrong, and by episode four, his best friend is sleeping with his girlfriend. That's worse than me. At least I can walk. And then when the new quarterback's dad, on leave for two weeks from Iraq, sees that his 16-year-old son is not only playing football and going to high school, but also earning the rent money by slinging soft serve and burgers and single-handedly taking care of his alzheimer's-ridden grandmother who's locked herself in a closet, he decides to go back to the war and sends his son to live in Oklahoma with a relative. That's worse than me. Way worse. I've never even been to Oklahoma. So, with the help of fictional characters in crisis, I made it through the linguine intact.


Which leaves me with the rest of the food. Do I forgo spicy pork and eggplant? And oysters? And Cuban take-out? And what about the places? Do I stop going to the Cape? Because I'm going on Friday. And, chances are, I'll eat some oysters. Maybe it's a coincidence; maybe not. Maybe I just need to wallow a little bit more. And wallowing is better in the summer by the ocean. With the salty brine of an oyster to wash the memories away.


Linguine with Clams and Chiles
adapted from Saveur, April 2010

kosher salt, to taste
1 lb. pasta, preferably linguine
1/3 c extra-virgin olive oil, plus more for drizzling
4 oz. pancetta, minced
2 cloves garlic, thinly sliced crosswise
2 serrano peppers, stemmed and thinly sliced crosswise
30 littleneck clams, scrubbed clean
1/3 c dry white wine
3 T chopped flat leaf parsley

1. Bring a large pot of salted water to a boil. Add pasta and cook, stirring occasionally, until just al dente, about 6 minutes. Drain pasta, reserving 1/2 c pasta water, and set aside. Meanwhile, heat oil in a large skillet over medium heat. Add pancetta and cook, stirring occasionally, until just crisp, abt 5 minutes. Using a slotted spoon, transfer pancetta to a paper towel and set aside.

2. Return skillet to medium heat and add garlic and half the peppers; cook, stirring often, until garlic is golden brown, about 3 minutes. Add clams and wine, increase heat to high, and cook, covered, swirling pan occasionally, until clams open and release their juices, 5 - 10 minutes. Using tongs, transfer clams to a plate and set aside. Bring sauce to a boil over high heat, return pancetta to pan, and add reserved pasta and 1/4 c cooking liquid. Cook, tossing pasta occasionally, until sauce clings, about 2 minutes. Sprinkle in some more of the cooking water if it seems too dry. Add 2 T parsley, season w salt, and toss to combine. Transfer pasta to a serving bowl, arrange clams over pasta, and pour over any clam juices from the plate. Drizzle with more olive oil and garnish with remaining serrano.

Wallow if needed; otherwise, just enjoy.

6.25.2010

Iron Chef: Lobster Roll


I chose to coast through college
selecting subjects that came easily to me and working just hard enough to secure an A, without ever worrying about actually learning something. I figured there'd be enough time for the details later. Well, later is now, and my lackadaisical ways and middle-aged memory loss have left me feeling slightly behind the curve.

Oh sure, I can be entertaining enough at dinner parties and book groups, but, in my work at a highly competitive high school, I'm reminded daily of my gaps in knowledge. Instead of choosing a profession where the coffee break conversation might be what's new with the Kardashians or the "octo-mom," I find myself surrounded by intellectuals who can breezily discuss any number of topics: linguistics, John Updike, Medieval China, or quantum mechanics. It can be daunting to say the least. After 45 years on the planet, the only subject I feel I can discuss with total confidence is the lobster roll. I try to work lobster facts into my repertoire whenever possible, asserting my intellectual prowess as best I can. "Did you know the tomalley serves the function of both the liver and the pancreas?" or, "Did you know that lobsters are the arachnids of the deep?" That sort of thing.


Since my childhood in Maine, I've sampled lobster rolls up and down the east coast. (I would never order one anywhere else; even inland New Hampshire is pushing the boundaries, and Vermont is out of the question.) I'm definitely a go-to person if you need a recommendation on your next trip to New England. Red's Eats: yes! Summer Shack: no! I've had $7 rolls Downeast, $24 rolls in the North End, and $32 rolls in the South End and loved them equally. I've had a long string of $15 rolls that should never have been on the menu (see Summer Shack above). But, I'm hard to please. And it's so easy to make a mistake: too much celery (or including celery at all); too much mayonnaise; not enough mayonnaise; using lobster that's been out of the ocean too long; not letting the lobster salad sit for at least an hour for the flavors to meld; serving it on a cold roll; over-chilling resulting in a watery and tasteless mess; experimenting with strange herbs (dill? really?); using a side-cut bun. The list goes on and on.... Most people shouldn't even bother.


Neptune Oyster lobster roll: best in Boston

A few years ago, when I was even more rigid than I am now, I found myself discussing favorite meals with Jean, then a new foodie friend. She's an artist and an expert on many things — I happily let her show me how to throw a pot and teach me the difference between cerulean and cobalt blue. But when it came time to discuss lobster rolls, I feared the friendship might come to a swift end. She's from New Haven. I don't know if you have any friends from New Haven, but they tend to be a bit braggy about all the food they claim New Haveners invented: the bagel, the cheeseburger, and the only thing I give them credit for, the clam pizza. Apparently when someone makes a lobster roll in the Elm City, they do away with mayonnaise altogether and top the chilled lobster with melted butter alone. Hmmmm.... I've already touched upon the risk of too much mayonnaise, but with only melted butter, you might as well just be eating a cold boiled lobster with a Parker House roll. What's the point? But, Jean refused to betray Connecticut and its strange ways, so we did the only thing two foodies can do when they disagree: compete. We arranged to meet at her house in Cambridge the following Saturday for a lobster roll cook-off.

The details aren't important. The only thing you need to know is that I won. My light, homemade tarragon mayonnaise was the perfect accompaniment to the succulent arachnid and buttermilk onion rings. But you don't have to take my word for it. Here: contrast and compare for yourself. Butter or mayonnaise? To be honest, I like a little of both.

Lobster Roll, Classic with Mayo

1 egg
1 T fresh lemon juice
1 t Dijon mustard
1/4 t salt
1/4 t pepper
1/2 c canola oil
1/2 c light olive oil
1 T chopped tarragon
The meat from one 1.5 lb lobster, torn into large chunks
Butter
Top-cut hot dog bun, preferably Pepperidge Farm

Blend egg, lemon juice, mustard, salt and pepper in a food processor. While processor is running, pour oil in a slow steady stream. Blend until thick and smooth.

Combine 2 T (or to taste) mayonnaise with lobster meat and chill, covered in plastic wrap, for at least two hours.

Just before serving, melt butter in a pan or on a griddle. Do not burn. When bubbling, sear the bun on every side until a light golden brown. Flatten just a little so the opening is wide enough for a lot of lobster.

Place lobster salad inside bun and enjoy! Onion rings are a particularly tasty side. As is a very cold beer. And, it's usually best to eat the lobster roll outside. By the ocean.

Elm City Lobster Roll

The meat from one 1.5 lb lobster, torn into chunks
Melted butter
Top-cut hot dog bun

Griddle bun as described above. Toss lobster with butter and insert into bun. Enjoy slightly less than you would the classic roll above.

5.24.2010

Just Like Obama

I tried to be Kenyan the other day, but it didn't work out.

Commonwealth School had its second annual "diversity" potluck lunch — a festive and delicious event where everyone is asked to bring in something good to eat. Preferably something that's meaningful and ethnic.

I'm short on ethnic.

Hopper's rendition of the lighthouse at the
end of my childhood street


When I was a kid, a lunch like this would have terrified me. On the southern coast of Maine, we didn't have diversity potlucks (or diversity at all for that matter), and if we did I wouldn't have attended. In the early '70s kids spent a lot of time standing around on the playground asking, "What are you?" In Cape Elizabeth it seemed the only acceptable answers were: English, French, Scottish, etc.... Irish, or Italian, perhaps, but, even if I had known where I came from, African certainly wouldn't have flown. As it was, I didn't have anything to say, so I would just slink away, panicked that the group would eventually turn to me, although I think we had a tacit agreement they never would.

I was adopted, and not only did I not look like anyone in my family, I didn't look like anyone in my school or town either. No one else I knew had brown skin (except Pearl Bailey, Sammy Davis Jr., and the Jeffersons), and my mother couldn't or wouldn't give me any answers.

Where's Janetta?

When I called my birth mother out of the blue at the age of 32, it only took about five minutes to fill in the black hole of my life (pun not intended, but it works). I'm half English and half Kenyan. My mother (the one I grew up without and now the only one I have left) can trace her family back to Henry Sampson, a passenger on the Mayflower. Google says he's Sarah Palin's ancestor too, but it's something I don't like to think about. My father was an international engineering student from Nairobi who my mother met the summer before her freshman year at Tufts.

Having grown up WASP and never known or cooked with any Kenyans, I now have the answers but still no food. No one wants kidney pie at a high school potluck, but I don't really feel the Kenyan connection. I was at loss — what should I make? Guacamole? Deviled eggs? Nothing seemed right.

Then fate stepped in. My new issue of Saveur arrived in the mail just a week before the scheduled lunch, and the magazine ran an article about Kenyan food.

James Fisher's photos for Saveur

I thought it was a sign.

It was not.

I made the Kuku Wa Nazi (chicken stewed in coconut milk) and it looked like vomit and tasted like nothing, so I threw the whole thing away like a week-old portion of fish. Nine pasty-looking chicken thighs swimming in a quart of coconut milk that no amount of turmeric or garlic could penetrate was not something I could share with pride. I really think they mistyped the recipe since I doubled the amount of chicken but kept the coconut milk measurement the same. I don't blame Saveur — it's still my favorite foodie magazine. My ethnic enlightenment just wasn't meant to be.

I arrived at the potluck empty-handed and filled with guilt. But even without a Kenyan contribution, the lunch was a huge success. My favorite dish was Mara's cheese enchiladas, which she'll write about next week.

The night before I had made an Indian curry, which I'll share with you here. I'm not Indian, but cabdrivers always think I am, and it was very tasty, which is all anyone really wants out of a potluck anyway.


Indian-Spiced Cauliflower and Potatoes
adapted from Gourmet TODAY

The original recipe doesn't call for a can of tomatoes, but it turns the dish into a curry; otherwise, it's more of a side dish. If you choose to omit the tomatoes, add 1/2 c water instead.

1 medium head cauliflower, cored and cut into 3/4"- wide florets
1 1/2 lbs Yukon Gold potatoes, peeled and cut into 1/2" cubes
5 T vegetable oil
1/2 t cumin seeds
salt
1 medium onion, finely chopped
2 garlic cloves, finely chopeed
2 t minced jalapeño, including seeds
2 t peeled fresh ginger
1 t ground cumin
1/2 t ground coriander
1/4 t turmeric
1/4 t cayenne
1 14 oz can of whole peeled tomatoes

Accompaniment: thick Greek yougurt mixed with chopped garlic, salt, and cucumber to taste and nan bread, available pre-packaged at Whole Foods

Put a rack in upper third of over and put a baking sheet on rack. Preheat oven to 475 degrees.

Toss cauliflower and potatoes with 3 T oil, cumin seeds, and 1/4 t salt in a bowl. Transfer to hot baking sheet, spread out in one layer and roast, stirring occasionally until potatoes are just tender and cauliflower is tender and browned in spots, about 20 minutes.

Meanwhile, heat remaining 2 T oil in a 12-inch heavy skillet over moderate heat until hot but not smoking. Add onion, garlic, jalapeño, and ginger and cook, stirring frequently, until very soft and beginning to turn golden, 8 – 10 minutes.

Add ground cumin, coriander, turmeric, cayenne, and ½ t salt to onion and cook, stirring constantly, for 2 minutes. Drain tomatoes and break up with your hands or a fork into the skillet, breaking up any browned bits from the bottom.

Stir roasted vegetables into tomato mixture and cook, covered, stirring occasionally, for about 5 minutes, until flavors are blended. Serve with yogurt mixture and nan.

4.09.2010

Sent from My iPork


I honestly wish I had never bought the iPhone. I did it pretty much for the look. And the timing was right — my contract with Verizon was up; Dan, Suzanne, Mara, and Bob all had one; and I didn't want to be left behind. Plus, it's a thrill to buy something beautifully packaged from the Apple store, and I thought it fit my personality. Which it does — the addictive side. The phone is hard for me not to touch even for a few minutes. And, it doesn't actually work as a phone. But it's good for everything else.

I use it as an alarm clock and reach for it first thing in the morning while still essentially asleep. I check the time, then my finger might slide over to the weather, so I know what to wear. And, hmmmm, I wonder if anyone has emailed me between midnight and 6:00 a.m.... Is there any new news about Sandra Bullock and Jesse James in the Huffington Post? What are the lead stories in the NYTimes and on Boston.com? What are the new movie listings on Fandango? What are the people I haven't seen since high school up to on Facebook? Maybe I should play a few rounds of Sappho's Twilight trivia game or look for cheap tickets to Paris on kayak.com. This all before I get out of bed. On my phone. Which, again, doesn't actually work as a phone. Because of AT&T.

I used to try to meditate in the morning. My new routine is pretty much the opposite — being more equal to a spiritual death than enlightenment. And I'll need some spirituality soon because it's only a matter of time before I crash my new car and injure myself or others. Remember when a red light meant you just sat and waited for the green, maybe singing along to the radio? Now it's an opportunity to check in with the rest of the world. As a consequence, I virtually never see the light turn and am either propelled forward by the honking of the car behind me or my daughter yelling, "Mom! Go!" The other day I tried not to touch my phone for the entire three miles between home and work, but I do it without thinking and then have a do-over for the next five minutes until I fall off the wagon again.

Then a couple of weeks ago I got an email from Dan and at the end it said, "Sent from my iPad." Tech envy ensued, and I headed for my car but stopped short when I realized that if I want to have a semblance of a life I can't ever buy another iAnything. Unless they develop the iPork. Because I love pork. And, after all, this blog is about food and not addiction or technology. So here's the pork.

Just before the release of the iPad, it was restaurant week here in Boston and I enjoyed a luxurious long lunch at Toro with Bob and Mara, who were on spring break. Of course the iPhone came with, so I could show you a photo of this:

Egg, potato and onion omelet with aioli

and this:

Foie Gras with pear and bacon chutney

I obsessively photograph anything and everything I eat, so those pix were par for the course. What I didn't expect to show you was this!


Right in the middle of lunch, in came a dead pig carried by the Vermont farmers who raised it. The Toro guys started butchering it right in the middle of the dining room. You can imagine how Mara, the vegetarian, clung to her seat and didn't even reach for her iPhone, but Bob and I were on the scene immediately and had an amazing, horrible, wonderful, omnivore food experience as we watched professionals quickly prepare the pig for its afterlife as carnitas and sausage.


We didn't get to eat any of the pig — it was for a cook-off that weekend at the Liberty Hotel, but it gave me a hankering for pork (it doesn't take much). So when I got home, I got away from my screen and in front of the grill to make a fab recipe from this month's Saveur. I suggest you do the same.

Sweet and Sour Glazed Pork Chops
100% plagiarized from Saveur, April 2010

4 10 oz. bone-in pork chops, frenched
3 T extra virgin olive oil
salt & pepper
1/3 c balsamic vinegar
2 T honey
4 T unsalted butter
1 sprig fresh rosemary

Put pork chops on a plate; drizzle with oil; season generously with salt and pepper; let sit for 30 minutes. Meanwhile, build a medium-hot fire in a charcoal grill or heat a gas grill to medium-high heat. Combine vinegar and honey in a 1-qt saucepan and cook over medium heat until reduced to 1/4 c. Stir in butter and rosemary and set aside. Put pork chops on grill and cook, occasionally turning and basting with balsamic mixture, until browned and cooked through, 12-14 minutes. Transfer to a platter and let sit for 5 minutes before serving.

I served them with fennel baked in milk and stewed sweet peppers, both from the same issue and the perfect accompaniments.

3.28.2010

Dough Boy

Ostensibly, my son Sam and I live alone, together. But actually we’re never really alone, because our constant companion is Food—the idea and reality of it. My long-suffering child has gotten used to hearing me natter on about produce and condiments, morning and night. He knows that any given week will include trips to a number of stores in pursuit of special ingredients. He has become accustomed to my tweaking and fussing over recipes culled from my cookbook collection and the numerous food blogs I regularly read. Generally extremely good-natured, he’s my willing grocery-shopping companion, and he has become fairly expert in his own right, capably and cannily navigating farmers’ markets and the produce sections of the various stores we frequent, with efficiency and pleasure. Sam can select perfectly ripe avocadoes for an evening’s guacamole, but knows also how to pass up the already ripe in favor of those sure to be just right for the next day. He knows how to curl his fingers under just so as he chops onions, and—yes, he is the son of… me.

I know that being the child of a food-obsessed mother is surely a mixed blessing. Even though he generally eats quite well and offers sound aesthetic advice on the food I make and how I present it, Sam has been feeling a little left out of the blog blast lately, so he and I sat down and talked about things he likes to cook with me. We came up with a long list—and I will write other posts about dishes and meals we enjoy making together —but we decided to focus, this time, on one of the more physical kitchen activities he enjoys: baking bread. (In the interests of full disclosure, let me say that even though my boy can be adventurous, sophisticated, and pretty game about eating the various things I buy, make, and insist on eating, he still has the typical kid’s soft spot for The White Foods. He’s a carb hound. And if he is going to chow down on bread, I’d just as soon it be very good bread, indeed.)

One of our favorite breads is focaccia. We’ve tried a number of different recipes, and one of the best is, not surprisingly, Marcella Hazan’s. It produces a succulent bread, moist enough to be delicious but not insipid, with some body and a good crumb. It ends up robust enough to support toppings, including Sam’s favorite, olives and rosemary. The resulting bread complements any number of Italian dishes. (I’ll admit that I’m not above making a meal of it, either—with some cheese, a salad, and a glass of wine. Most satisfying.)


Of particular interest: Marcella’s description of kneading the dough. When Sam was new to kneading, it served us well; the process is very clearly described, and Sam discovered that his favorite part (besides gobbling up the end result) is the energetic manipulating and slapping and dropping of the dough, so helpfully described by Marcella: “Pick up the dough, holding it by one of the tapered ends, lift it high above the counter, and slap it down hard again several times, stretching it out in a lengthwise direction.” Kinetic baking fun ensues, with speculation about just how high "high" means, and with some potentially therapeutic benefits for adults, as well; I, myself, don’t mind slapping around some dough after a trying day.

Mixing bread dough: sticky, kinetic fun

If you’ve set aside enough time to bake a yeast bread and happen to have a playful and eager kid in the house, I highly recommend making a couple of batches. Make focaccia with the first, and use the second to shape some dough creations. To offer inspiration for the shapes, Sam and I are including a recipe for “Tongue Rakers” from a pleasingly silly and diverting book, Roald Dahl’s Even More Revolting Recipes (1994), a collection of recipes created by Roald and Felicity Dahl and based on and inspired by food in Dahl's books. The recipes are meant to appeal to parent-child teams, and are great fun—very simple, and accompanied by delightful illustrations by Quentin Blake. The “rakers” come out tasty; Sam likes to take them to school as his snack. If you’re pressed for time but feel like pleasing your kid and smelling that magical yeasty-bread-dough-in-the-oven smell, you could also just purchase some prepared pizza dough and make the tongue rakers from that. I know what it’s like to be pressed for time, and these little creations come out looking cute and mighty tasty.

So: Make bread, not war; and if possible, do it with your kid. Sam, my accomplished dough boy, and I highly recommend it.


Focaccia with Onions, Genoese Style
Adapted from Marcella Hazan’s Essentials of Classic Italian Cooking

Marcella comments: “The dough in the recipe given here produces a thick, tender focaccia with a crisp surface, which you can top with sautéed onion in the Genoese style, as described below, or vary in one of the alternative ways indicated, or devise a suitable variation of your own.”

For the dough
1 package active dry yeast
2 c lukewarm water
6 ½ c unbleached flour
2 T extra virgin olive oil
1 T salt

For baking the focaccia
A heavy-duty rectangular metal baking pan, preferably black, about 18 by 14 inches or its equivalent
Extra virgin olive oil for smearing the pan
A baking stone
A mixture of ¼ c extra virgin olive oil, 2 T water, and 1 t salt
A pastry brush

For the onion topping
2 T extra virgin olive oil
4 c onion sliced very, very thin

1. Dissolve the yeast by stirring it into ½ c lukewarm water, and let it stand about 10 min or slightly less.
2. Combine the yeast and 1 c of flour in a bowl, mixing them thoroughly. Then add the 2 T olive oil, 1 T salt, ¾ c water, and half the remaining flour. Mix thoroughly until the dough feels soft, but compact, and no longer sticks to the hands. Put in the remaining flour and ¾ water, and mix thoroughly once again. When putting in flour and water for the last time, hold back some of both and add only as much of either as you need to make the dough manageable, soft, but not too sticky. On a very damp, rainy day, for example, you may need less water and more of the flour.
3. Take the dough out of the bowl and slap it down very hard several times, until it is stretched out lengthwise. Reach for the far end of the dough, fold it a short distance toward you, push it away with the heel of your palm, flexing your wrist, fold it, and push it away again, gradually rolling it up and bringing it close to you. It will have a tapered, roll-like shape. Pick up the dough, holding it by one of the tapered ends, lift it high above the counter, and slap it down hard again several times, stretching it out in a lengthwise direction. Reach for the far end, and repeat the kneading motion with the heel of your palm and your wrist, bringing it close to you once more. Work the dough in this manner for 10 min. At the end, pat it into a round shape.
(Marcella notes that you can complete the first two steps in a food processor but suggests, in true Marcella fashion, that “the hand method, aside from the physical satisfactions it provides, produces a focaccia with better texture.” I am all for the physical release of throwing and kneading dough; I work up a satisfying sweat and can marvel close-up at how magically the dough morphs from sticky and slightly recalcitrant to silken and accommodating. Every task should be so satisfying!)
4. Smear the middle of the baking sheet with about 2 T olive oil, put the kneaded, rounded dough on it, cover it with a damp cloth, and leave it to rise for about 1 ½ hours.
5. For the topping: Put the 2 T of olive oil and all the sliced onion in a sauté pan, turn the heat on to medium high, and cook the onion, stirring frequently, until it is tender, but not too soft. It should still be slightly crunchy.
6. When the indicated rising time has elapsed, stretch out the dough in the baking pan, spreading it toward the edges so that it covers the entire pan to a depth of about 1/4 in. Cover with a damp towel and let the dough rise for 45 min.
7. At least 30 min before you are ready to bake, put the baking stone in the oven and preheat oven to 450 degrees F.
8. When the second rising time for the dough has elapsed, keeping the fingers of your hand stiff, poke the dough all over, making many little hollows with your fingertips. Beat the mixture of oil, water, and salt with a small whisk or a fork for a few min until you have obtained a fairly homogeneous emulsion, then pour it slowly over the dough, using a brush to spread it all the way out to the edges of the pan. You will find that the liquid will pool in the hollows made by your fingertips. Spread the cooked onion over the dough, and place the pan on the middle rack of the preheated oven. Check the focaccia after 15 min. If you find it is cooking faster on one side than another, turn the pan accordingly. Bake for another 7 to 8 min. Lift the focaccia out of the pan with spatulas, and transfer it to a cooling rack.

Serve focaccia warm or at room temperature that same day. It is preferable not to keep it longer, but if you must, it is better to freeze than to refrigerate. Reheat in a very hot oven for 10 to 12 minutes.

Variations (Sam and I combine the two below)…
Focaccia with Fresh Rosemary
Omit the onions and their cooking oil, and add several short sprigs of rosemary. Make the focaccia as directed in the basic recipe. When you check its progress in the oven after 15 min, spread over it the small sprigs of rosemary, and finish baking.

Focaccia with Black Greek Olives
Omit onions and their cooking oil, reduce the salt in the oil and water mixture to ½ t, and add 6 oz black Greek olives. They should be the thin-skinned round ones that vary in color from dark brown to black. Do not use Kalamata. (Sam and I used dry-cured Greek olives—very salty, but his preference.) Cut the olives all the way around their middle and loosen them from the pit, producing 2 detached halves from each olive. After you have poked hollows into the dough in the pan, as directed in the basic recipe, push the olives, cut side facing down, into the hollows, embedding them deeply into the dough, then brush the dough with the oil, water, and salt mixture. Bake the focaccia as directed in the basic recipe.


Floury Sam high jinks while waiting to knead the dough

Tongue Rakers
Adapted from Roald Dahl’s Even More Revolting Recipes

A plate of Tongue Rakers
You will need:
Bowl, lightly greased
Plastic wrap
Small saucepan
Sieve
Rolling pin
Large baking sheet

1 batch of bread or pizza dough
1 onion
2 cloves of garlic
1 ½ T butter
1 ¼ t salt
flour
1 egg yolk
1 ¼ t rosemary, fresh or dried
½ t coarse salt

1. Heat the oven to 400 deg. F.
2. Mix the bread dough. Knead and allow to rise until doubled in size (up to 1 hour).
3. Meanwhile, finely chop the onion and garlic. Melt the butter in a small saucepan and add the onion and the salt. Cover, and cook over a very low heat for 15 minutes or until soft. Add the garlic and cook for 2 more minutes.
4. Drain the onion and garlic in a sieve and allow to cool.
5. When the dough has risen enough, add the cooled onion and garlic and knead again for 5 min. If the dough becomes sticky you may need to add a bit more flour—just enough to make it easy to knead.
6. Break off seven small pieces and one very large piece
7. Roll the largest piece so that it is the length of 1 ½ pencils, and a little bit thicker than a pencil.
8. Place this on the baking sheet.
9. Roll all the other pieces to the same thickness but half the length, and then attach these (by squishing) to one end of the long piece—to make a “rake” of dough. If your baking sheet is too small to do such a big one, you can just make it smaller.
10. Brush the Tongue Raker(s) with the egg yolk, and sprinkle with rosemary and coarse salt.
11. Bake the Tongue Rakers until golden brown—probably 20-25 min.
12. Gobble up; i.e., rake your tongue with these yeasty treats!

2.28.2010

The Valley of the Sun


Well, not only is my post a week late, but I don't even have that much to say. In the past two weeks, I've cooked only once. Instead, I've been basking in beautiful 78 degree Scottsdale, Arizona, a.k.a. the "Valley of the Sun." Don't worry, dear readers, I've still been eating, more than the recommended daily allowance of pretty much everything. But instead of cooking in, I've been eating out at fabulous restaurants like the Spotted Donkey, Matt's Big Breakfast, and Cave Creek Coffee Company (which I intend to buy if I ever find myself with a second home in Arizona along with excessive amounts of disposable income).

If, like me, you've been suffering from yet another New England winter and you're suddenly plopped down into the dry hot desert, your thoughts might turn not only to food, but also to margaritas. Here's a photo of my first of the trip — a specialty of the Spotted Donkey on North Scottsdale Road. Once I order the necessary prickly pear puree through the mail, I'll give you a recipe.

And, here are the pomegranate margaritas I made at my sister-in-law's the only night I did cook.


And, finally, here is the first tub of two, which I consumed at another place I can't remember the name of because it wasn't as good as the Spotted Donkey.


I did owe my sister-in-law/hostess a belated Christmas present which, lamely, took the form of dinner. So, one night and one night only, we stayed in. I made a pitcher of the aforementioned pomegranate margaritas, a bowl of guacamole, chopped salad, tzatziki, and the best grilled chicken kabob you'll ever have. I'm quite serious. It's adapted from Gourmet's "Foolproof Grilled Chicken," which I highly recommend. You can find the full recipe on epicurious.com. But if, like me (again), your focus is more margarita and less poultry, you may be too tipsy to go through the whole time-consuming brining step and want to just cut to the chase, cube the chicken, and skewer it with sticks. That way you get outside to the grill much quicker — drink in hand and under the sun, where you belong.

Foolproof Grilled Chicken Kabobs
adapted from The Gourmet Cookbook

The key is to put the sauce on the chicken after grilling. Not before.

1/4 c fresh lime juice
2 T Asian fish sauce (some day I'll wax poetic about this particular condiment)
1 large garlic clove, minced
1/4 c finely chopped cilantro
3 T finely chopped mint
1 t red pepper flakes
1 t salt
1/2 c vegetable or canola oil

1.5 lbs boneless chicken cubed

Make the vinaigrette: whisk together the lime juice, fish sauce, garlic, cilantro, mint, red pepper flakes, and 1 t salt in a large bowl. Add oil in slow stream until combined.

I'm realizing that I'm at the point where I should tell you how to grill the chicken. I could either experiment with timing and delay this post another week, or I could just tell you to cook the chicken on your grill until it's cooked through but not dry. I'm going with option number two.

Once the chicken is cooked, transfer to the bowl of vinaigrette and turn to coat. Transfer to a platter and garnish with cilantro and mint.

2.15.2010

Topsy-Turvy

Topsy-Turvy: adv.: 1, in utter confusion or disorder; 2, with the top or head downward; upside down. adj.: totally disordered.
Probably ultimately from tops + terve, obsolete English, to turn upside down.
Date: 1528

Some of you might have noticed that I didn’t post in my assigned order two weeks ago; Janetta graciously stepped into the gap because I was having one of those weeks—actually, if truth be told, a number of challenging weeks in relentlessly rapid succession. Midyear grading segued seamlessly into myriad other teacherly duties and motherly chores; things came up, added up, blew up. My life was a bit of a muddle. In short, things felt topsy-turvy.

But I’m back, all is well, and I’m dedicating this post to the concept of topsy-turvyness. Let’s embrace the idea of turning things upside down—inversions are great in yoga class; why not in the kitchen? Thus, I’m giving you a recipe for a potato cake that requires you to flip it to serve it. (The technique is also used in cooking things like Chinese fried noodle cakes.) A word to the wise: flipping is certainly not rocket science, but if you have not flipped a potato cake or some such thing, doing so merits a steady hand and a bit of concentration, if not practice. (My first time flipping a potato cake, it slithered to the floor, victim of a brief lapse in my attention as I looked away oh-so-quickly to talk to my dog. I feel sure that you will suffer no such fate, having been warned.)

This potato cake works beautifully as a delicious but rather demure side dish, complementing a variety of foods; but I’m suggesting that, accorded its own garnishes, it can and should shine as a main dish in its own right. My inspiration? One of the courses Joe and I recently enjoyed as part of the very fine vegetarian tasting menu at Ten Tables in Cambridge: a potato gratin nestled on a thick pool of, I believe, Romesco sauce, and garnished with pickled red onions and some greens on the side. The combination of textures and flavors proved exciting, colorful, and very tasty. (Alas, no pictures of the plate at Ten Tables; it was far too romantically dark to get a good shot.)

Thus, I am including recipes for Romesco sauce and pickled onions, as well. You can add greens prepared any way you like. Fresh watercress (especially red, my new favorite, bought at Wilson Farm), or cooked spinach, broccoli rabe, or chard would all be nice. I’d probably go with a classic Spanish preparation of spinach sautéed in a bit of olive oil, with garlic, pine nuts, and raisins. To round out the meal, you could serve a salad, a cheese course with bread, or perhaps some crostini spread with mashed cannellini, olive oil, garlic, and herbs.

I could go on a bit more, but as things are, if not topsy-turvy, still quite busy, I'll keep this post short and sweet—and, as it were, savory. Enjoy!


Gâteau de Pommes de Terre L’Ami Louis
(L’Ami Louis’s Potato Cake)
Adapted from Patricia Wells’s Bistro Cooking. Wells notes, “this is the late Antoine Magnin’s famous potato cake” from the Paris bistro L’Ami Louis. At the bistro, the potatoes are fried in goose fat. Wells suggests poultry fat or butter; I stick to butter.

3 T unsalted butter
2 lbs baking potatoes, such as russets, peeled and very thinly sliced
Salt
1 T (1/2 oz) unsalted butter
3 garlic cloves, coarsely chopped
3 T coarsely minced fresh flat-leaf parsley

1. Preheat the oven to 400 degrees F.
2. Melt the 3 T butter in a large saucepan over medium-high heat. Add the potatoes and season with salt. Sauté, partially covered, tossing the potatoes from time to time until most of the potatoes are partially browned on both sides, about 25 minutes. Reduce the heat, if necessary, to avoid burning the potatoes.
3. Using a large, slotted spatula, transfer the browned potato slices to a 9-inch round, nonstick, oven-proof skillet. Press the potatoes firmly and evenly into the pan. Bake, uncovered, until the potatoes are crisp and golden, about 20 minutes.
4. Place the skillet over medium-high heat and rub the butter around the edges of the pan, letting it melt down into the inside rim of the pan.
5. Now comes The Flip: Place a large plate on top of the pan and invert both skillet and plate to unmold the potato cake. (Whether the potatoes unmold into a firm cake or a looser cake will depend upon the firmness and freshness of the potatoes used.)
6. Scatter garlic and parsley on top of cake. Serve immediately.

Yield: 4 to 6 servings


Romesco Sauce
Adapted from Penelope Casas’ Tapas: The Little Dishes of Spain

1 large ripe tomato (or you can substitute 2 to 3 Muir Glen canned fire-roasted tomatoes, in which case you need roast only the garlic)
5 cloves garlic, peeled
1 dried sweet red pepper (such as “New Mexico” style)
½ dried red chili pepper, seeded, or ¼ t crushed red pepper
½ c water
3 T plus 1 t red wine vinegar
½ c plus 1 T olive oil
A ¼-in slice of crusty bread
10 blanched almonds
Salt
Freshly ground pepper

Roast the tomato and garlic in an ungreased roasting pan at 350 degrees F for 30 minutes. Place the dried red pepper and chili pepper in a saucepan with the water and 3 T of the vinegar. Bring to a boil, cover, and simmer for 5 minutes. (If using pepper flakes, add them later to the food processor.)

Heat 1 T of the oil in a small skillet and fry the bread until golden on both sides. Transfer to a food processor or blender. In the same oil fry the almonds until golden and add to the processor, along with the boiled red peppers (if using crushed red pepper, add here), garlic, and tomato. With the motor running, pour in gradually the remaining ½ c of oil, the remaining t of vinegar, salt, and pepper. Strain, taste for salt, place in a serving bowl, and keep at room temperature.

Sauce can be made a day in advance.

Pickled Onions
From Deborah Madison’s Vegetarian Cooking for Everyone
(Great in sandwiches, salads, and pastas, and as a garnish for any number of dishes.)

1 lb. red onions, peeled but left whole
1 ½ c white wine vinegar
2 bay leaves
4 marjoram or thyme branches
several small dried red chiles, optional
1 T sugar
1 t black or mixed peppercorns, bruised
Salt

Bring a teakettle of water to a boil. Slice the onions crosswise, ¼ in thick or thicker. Separate the rings and put them in a colander, then pour the boiling water over them. Mix the other ingredients plus 1 ½ c cold water and several pinches salt in a large bowl and stir to dissolve the sugar. Add the onions, submerging them in the liquid by placing a plate on top. If there isn’t enough liquid, add equal amounts of vinegar and water. The color will begin to develop in about 15 minutes. You can use the onions then or chill them first. Store in a covered jar in the refrigerator. (They keep for weeks in the fridge, but will lose some of their crunch over time.)

***

What to serve for dessert? The clever among you will no doubt think, of course, of pineapple upside down cake. But no: I have one more trick up my sleeve—a pineapple dessert, yes, but an unusual, and unusually effortless, one. Joe introduced me to it; he’d had it the week before at our friend M’s house. It’s so simple that no formal recipe or measuring is really necessary. But, in the interests of giving credit where it is due, I tracked down its origins; it apparently appears in Mario Batali’s book on Spanish cuisine based on the TV show he did with Gwyneth Paltrow. Served this way, pineapple tastes like itself, only gussied up in an interesting way. It is sweet and sour, with the mysteriously dark sweetness of molasses added to the mix, and simplicity itself—and thus, good to whip up when you’re having one of those topsy-turvy weeks.


Pineapple, gussied up, for our friend Annie's New Year's Open House

Pineapple with Lime Zest and Molasses
From Mario Batali's (with Gwyneth Paltrow), Spain… A Culinary Road Trip

1 ripe pineapple, peeled, cored, and cut into bite-sized pieces
Grated zest of 1 lime
3 T robust molasses

Put the pineapple on a plate, sprinkle it with the zest, and drizzle with the molasses.

2.03.2010

New Happy New Year

Overall I had a pretty good holiday season involving friends, family, Brooklyn, Broadway, Momofuko pork buns, movies, latkes, cookies, lights, and trees — all culminating with a cork in my eye at the stroke of midnight on New Year's Eve (we decided it was good luck). But in the midst of these festivities, I had the whole upcoming arraignment thing in the back of my mind (see previous post entitled The Commonwealth of Massachusetts vs. Me), along with an imaginary brain tumor that lasted a solid week. I even went to the doctor, which is unheard of, who didn't quite laugh at me, but almost.

Once the arraignment had come and gone without too much fanfare, and my imagination allowed the tumor to shrink, I decided I needed yet another fresh start. What better way than Chinese New Year? I looked it up and found the first day of the Year of the Tiger fell on January 30 (apparently incorrectly; I'm looking it up now, and Google very clearly states that it's not until February 14). In any case I sent out some emails to make sure I'd have a critical mass, and started to obsess about what to cook. I received a couple of books for Christmas that I already owned and exchanged them at Brookline Booksmith for a beautiful cookbook entitled Mastering the Art of Chinese Cooking by Eileen Yin-Fei Lo (a slightly derivative but fairly accurate title).


A show on NPR listed it as one of the top 10 cookbooks of the year. I couldn't agree more. I can see how someone could be put off by several of the recipes that call for shrimp roe, 85 Thai chiles (no fewer, no more), stocks that cook for days, or the Marcella-like instructions (see chile note) that at times sound as though if you can't find the proper brand of mung-bean paste, you might as well not even bother. But I have to tell you, the multiple recipes that I've made have all been straightforward and unbelievably delicious. And for those of us hankering for some Asian food who live in eastern Massachusetts, there's no better place to start than H-Mart in Burlington.

It's brand new, sparkling clean, and you can buy anything from a Hello Kitty backpack to a flat screened TV to pork belly and a lifetime supply of rice. There's an entire room dedicated to kim chee. And, if you ever need a trotter not connected to a pig, H-Mart is your destination.

I stocked up on Shaoxing wine, double dark soy sauce, oyster sauce, peanut and sesame oils, ginger, 4 different kinds of bok choy, eggplant, rice wine vinegar, and multiple pork products — everything I needed to make an authentic lunar year banquet. The rest of this post will just be photos and recipes. Why waste more space? You'll have them just in time for the real Chinese New Year!

Here was my menu (2 of the yummiest and shortest recipes follow):

Clams in Black Bean Sauce


Dan's Tea Eggs
(So beautiful and v tasty w the clams. I don't have the recipe, though. Maybe Dan will comment w the details.)


Potstickers
(Miraculously made by S herself)


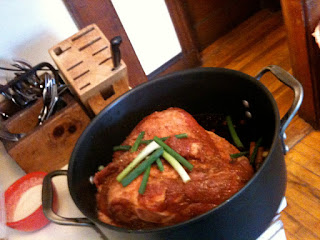
Long-Cooked Pork Shoulder


Eggplant with Garlic Sauce

I also made stir fried bok choy and my friend Valerie brought tofu and noodles (for a long life), For some reason I don't have pix of those, but they were good too!

The Recipes

Clams Stir-Fried with Black Beans

Adapted (but almost verbatim) from Mastering the Art of Chinese Cooking by Eileen Yin-Fei Lo, as are all the other recipes. Who am I to tinker? But I have not included her recipes for chicken stock and other incredibly time consuming things that you can buy at the store. And I'm not as specific as she is with my cleaver techniques. In fact I've left them out altogether.

For the clams
2 quarts water
30 medium-size clams
3 T peanut oil
2 T peeled and shredded ginger
2 T garlic
3 T fermented black beans, rinsed twice and well drained (or black bean paste).
1 T thinly sliced cilantro
1 T thinly sliced scallions

Sauce
2/3 c chicken broth
1 1/2 T oyster sauce
1 1/2 t dark soy sauce
1 t sesame oil
1 tablespoon mung bean starch (I actually used cornstarch. H-Mart is great but overwhelming and I had to leave after an hour. The brain tumor was returning)
1 t sugar
pinch of white pepper (I did invest $6.99 in white pepper, but I don't think it's necessary)

1. Pour the water into a wok and bring to a boil over high heat. Add the clams and allow the water to return to a boil. As the clams open, remove them to a waiting dish, to prevent them from becoming tough. Continue until all of the clams have opened (discard any that do not). Set the clams aside. Discard the water and wash and dry the wok and reserve.

2. Make the sauce — in a small bowl, mix together all of the ingredients and reserve.

3. Heat the wok over high heat for 40 seconds (under no circumstances should you heat for 37 seconds; if that happens, cool the wok and start again. Joking). Add the peanut oil and using a spatula, coat the wok with the oil. When a wisp of white smoke appears, add the ginger, garlic, and black beans and stir to mix well for about 1 minute, or until the garlic and black beans release their fragrance. Add the clams and stir to mix for 2 minutes. Make a well in the center of the clams, stir the sauce, and pour it into the well. Stir constantly for about 2 minutes or until the sauce thickens and the clams are thoroughly coated with the sauce.

4. Sprinkle with the cilantro and scallion and serve.

Eggplant with Garlic Sauce

Sauce
1T double dark soy sauce
2 t oyster sauce
1 t white rice vinegar
1/2 t Shaoxing wine
1/2 t hot pepper flakes
2 t sugar
1/2 t cornstarch mixed w 2 t chicken or vegetable stock
1/4 t salt

Eggplant
4 cups peanut oil
1 lb Asian eggplants sliced lengthwise into 1/2 inch wide and 3 inch long strips
2 t minced garlic

1. Make the sauce — in a small bowl, mix together all of the ingredients and reserve.

2. Heat a wok over high heat for 45 seconds. Add the peanut oil and heat to 350F on a deep frying thermometer. Carefully lower the eggplant into the oil. Cook the strips for 2 to 3 minutes, or until they soften. Using a slotted spoon, lift out the strips and allow the eggplant to drain over a bowl.

3. Pour off all but 1 1/2 T of the peanut oil from the wok and heat over high heat for 30 seconds. When a wisp of smoke appears, add the garlic and stir for 35 seconds, or until it releases its fragrance. Return the eggplant to the wok and stir-fry for 1 1/2 minutes, or until it is well-mixed with the garlic. Make a well in the center of the mixture, stir the sauce, and pour it into the well. Stir to mix well for about 2 minutes, or until the sauce thickens.

4. Turn off the heat and serve.